
Hey everyone! In today’s post, Swarna will take you through her process of creating watercolour calligraphy and lettering on Procreate. Not only will you learn skills like digital calligraphy, I’ll be demonstrating advanced procreate canvas and procreate brush techniques.
About me:
Hi, I’m Swarna, a calligraphy artist and designer based in Hyderabad, India. With over four years of experience, I specialize in modern calligraphy, transforming words into beautifully crafted art using traditional and digital tools. Procreate is my go-to app for everything from drafting to design, and I’m not exaggerating when I say that not a day goes by without opening that app. Watercolour calligraphy has a special place in my heart, and I love sharing tips to help others explore this creative style. Let’s create something beautiful together!
Check out more of my art on Instagram @swarna.creates
Tools needed:
Procreate app, iPad and Apple Pencil
A watercolour texture image (you can find this on Google – but do not download copyrighted images)
Brushes and their corresponding brush sets:
I love using a mix of watercolour brushes that I purchased from different artists to achieve beautiful, realistic watercolour effects. Worry not; I’ll show you how to achieve it with Procreate’s default brushes. I recommend creating a new brush set with the below brushes. Don’t forget to duplicate the brushes to have the original ones intact).
Script brush – Calligraphy brush set
Soft Brush – Airbrushing brush set
Blotchy – Calligraphy brush set
Glover – Materials brush set
Wet Glaze – Water brush set
Clouds – Elements brush set
Dove Lake – Textures brush set
Waste Land – Industrial brush set
Preparing the Canvas:
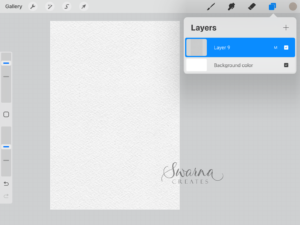
My go-to canvas size is 8×10 inches with 300 dpi.
Import the watercolour texture image on a new layer and set its blend mode to “Multiply.”
Process for watercolour calligraphy:
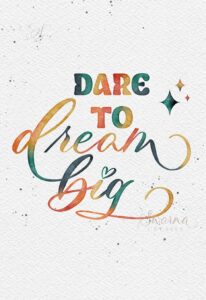
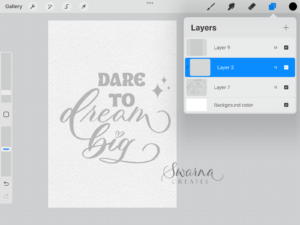
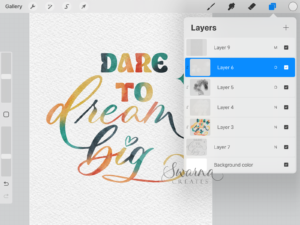
Add a new layer below the watercolour texture layer and write a word or quote of your choice with the “Script” brush in light grey colour (#acacac)
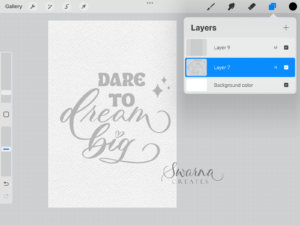
Add a new layer above the quote layer and turn on the “Clipping Mask”.
Using the “Soft brush” add colours of your choice to the layer. Keep the colours random, but choose colours that blend well together.
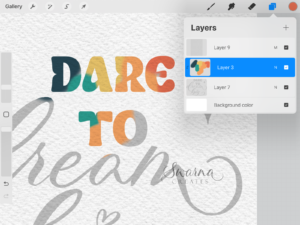
With the smudge tool, select the “Blotch” brush and smudge the colours so they blend together. Make sure there are no hard lines of colour anywhere.
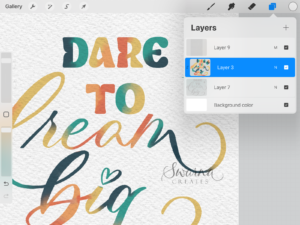
Add a new layer and turn on the clipping mask. Pick the colour white (#ffffff) and select the Glover brush. With size at 10% and opacity at 22%, paint on the layer ensures that the paint covers all of the lettering. This step is to lighten the colours and give it a watery effect. (As traditional watercolours dry, they appear lighter on paper, and this step mimics that effect).
 Add a new layer and turn on the clipping mask. Change the blend mode to “Overlay”. Select the Wasteland brush and pick the colour Black (#000000). With size at 24% and opacity at 30%, add random brush strokes on the layer. Add a few strokes by varying the brush size. This step is to add the effect of dried paint stains.
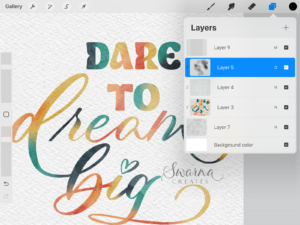 Add a new layer and repeat the previous step with white (#ffffff). Alternate between the Clouds, Wasteland and Dove Lake brushes) and add random paint strokes.
 Add a new layer and turn on the clipping mask. Set the blend mode to “Overlay”. Set the opacity of the layer at 70%. Pick the black colour and select the Wet Glaze brush with size at 3% and opacity at 56%. Go over the lettering, adding strokes only at the edges. This step is to give the dry hard edge effect.
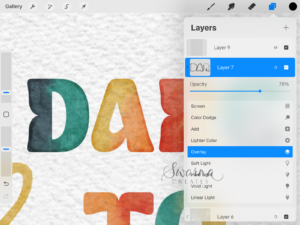
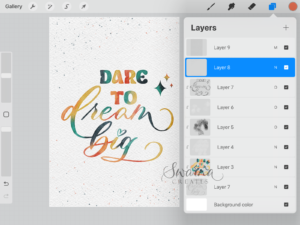
Add accents like flowers, paint splatter, or stars to elevate your quote.
Pro tip: Present your work over a mockup to give a realistic feel to your audience.

I hope this tutorial inspires you to dive into the enchanting world of digital watercolour calligraphy! If you give it a try, I’d love to see your beautiful creations—share them on Instagram and tag me so I can admire them and show some love.
Happy Creating!